


The Hidden World of Photomicrography
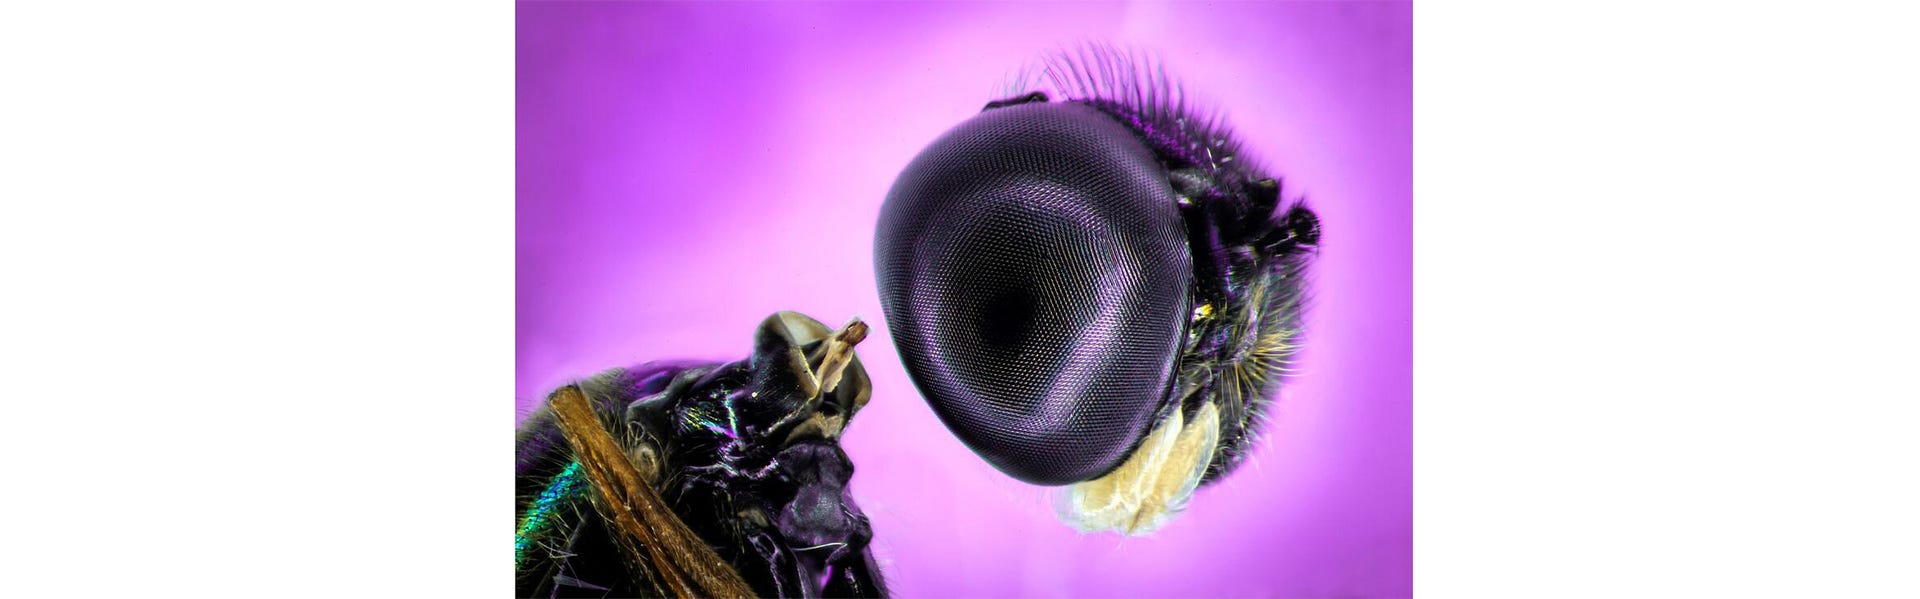
Insect Thorax at 7.2X, Darkfield & Reflected Light, 4 sec, ISO 100, 32 stacked images
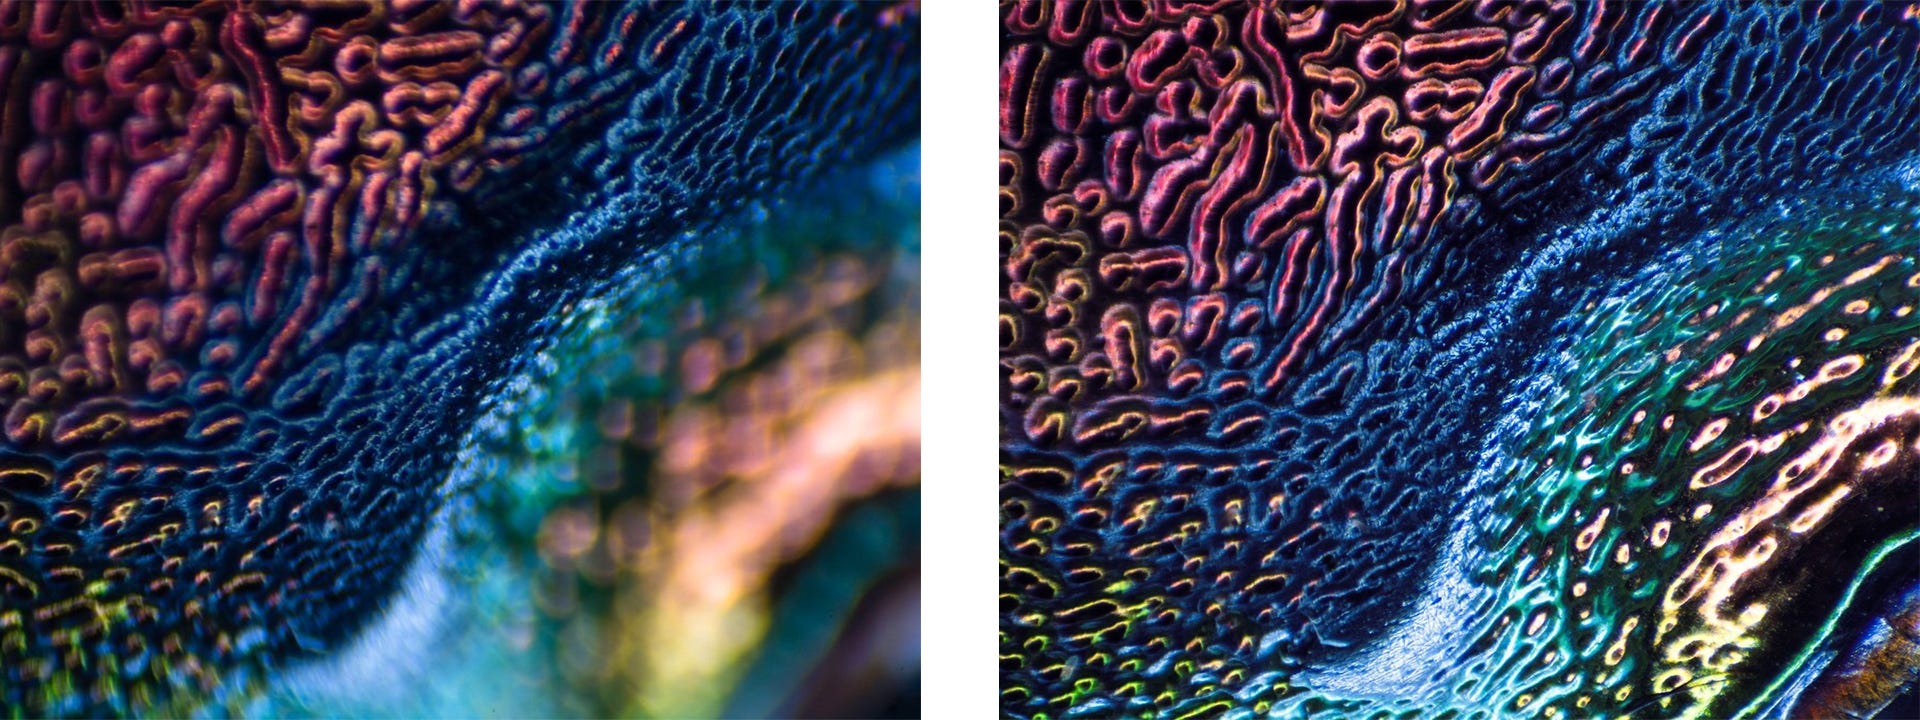 Black Solider Fly at 7.2X, Reflected Light, ISO 100, 3 sec, 52 stacked shots, color profile changed
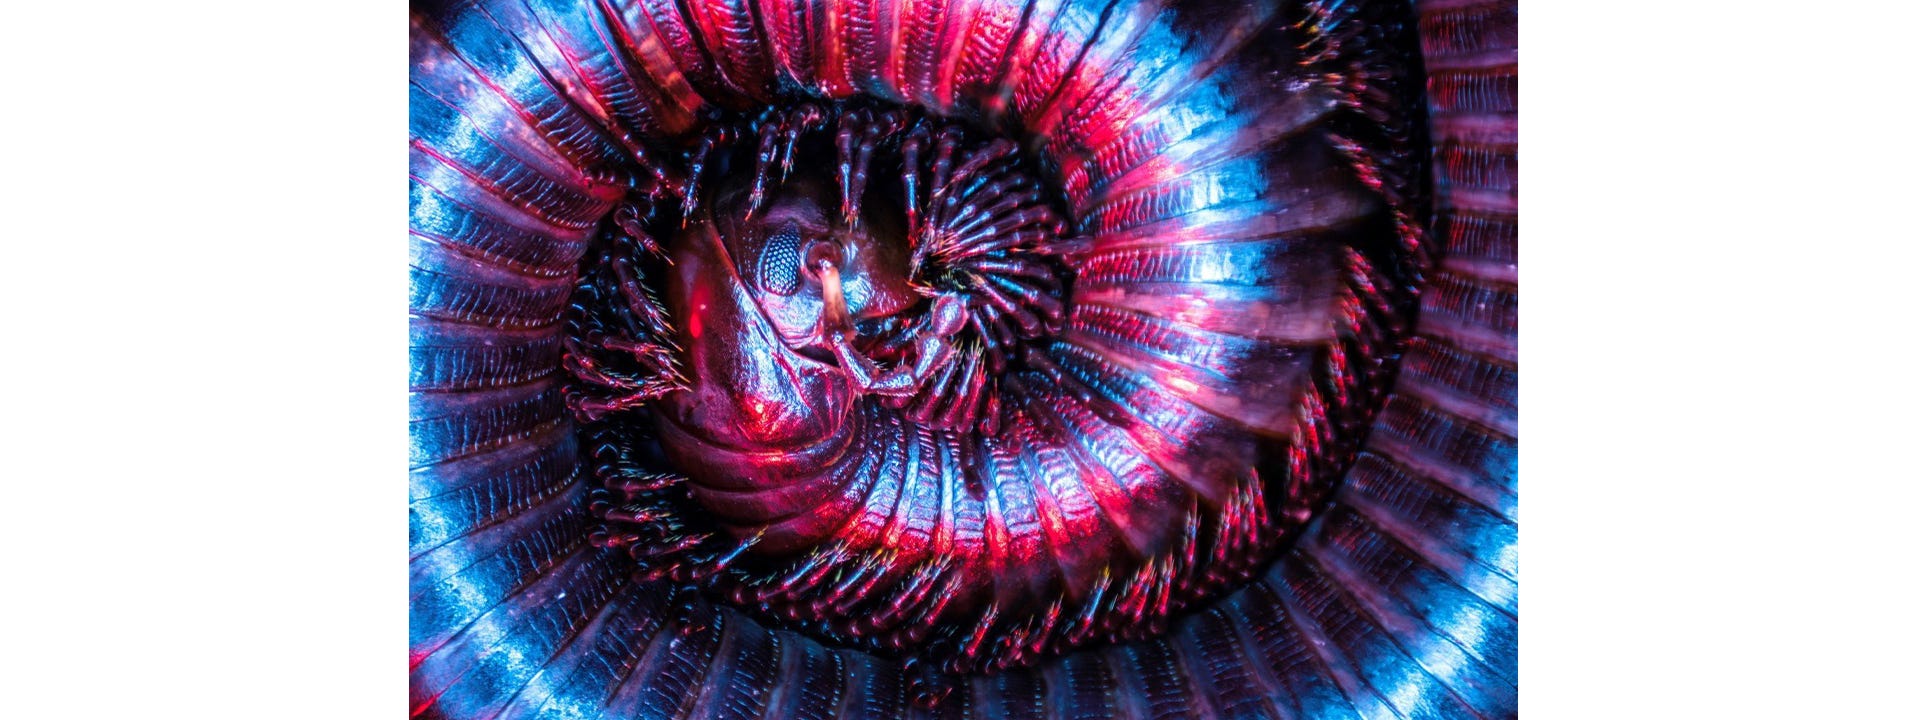 Millipede at 4.8X, Reflected Light with Glow Stick, ½”, ISO 100, 39 images stacked
Nikon Small World >
Nikon Instruments >
Microscopy U >
Helicon Soft >
Amateur Micrography >
Millipede at 4.8X, Reflected Light with Glow Stick, ½”, ISO 100, 39 images stacked
Nikon Small World >
Nikon Instruments >
Microscopy U >
Helicon Soft >
Amateur Micrography >
What is Photomicrography?
Photomicrography (photo-my-craw-graphy) goes by a number of names including microphotography, microscopic photography, and photomicroscopy. It is a mouthful to say but, in short, is the capturing of images through the use of a microscope to show a magnified image. By using high-magnification equipment, a photographer is able to see extensive details that wouldn’t otherwise be visible to the naked eye. Not even visible with the use of a macro lens! You might have thought these were the same genres but, surprisingly, they are not. The common rule of thumb with macrophotography is that the image being reproduced is at least a 1:1 scale. This means the subject is being viewed at life size. 2:1 means twice as large, 3:1 means three times, and so on. But this has obvious limitations. You can only get so close to a subject before no more detail can be gained. Otherwise, our eyes would be microscopes and playing with bugs and stuff when we were kids would've been that much more amazing. This is where microphotography comes into play. The equipment and techniques vary so for the purpose of this post we will focus on stereomicroscopes. Stereomicroscopes bridge the gap between macrophotography and microphotography the closest. This equipment is generally used for dissecting, jewelry inspection, and electronics. The images formed create a 3D image by using two scopes that merge in the middle to create depth. Below is an example of a typical set up. Other microscopes shine or scan the subject with light, electrons, photons, etc. I am organizing to use both confocal and electron microscopes at nearby universities, but will cover how those work and the subjects you can photograph in a later post.
Black Solider Fly at 7.2X, Reflected Light, ISO 100, 3 sec, 52 stacked shots, color profile changed
Magnification
Before we get too far ahead, let’s define magnification and make sure we have a solid understanding for when you're ready to photograph. Magnification is essentially a ratio of the size of the image to that of the object. When you see 10X, 100X, 1000X, etc. it can be understood as an image being formed that is 10X, 100X, 1000X, etc. times larger than it really is. The details of the fly above, and Rainbow Dung Beetle below, shows what detail can be seen at 50X and 25X respectively. When magnifying to such a level, there is a high chance of chromatic aberration which is why you should always choose quality over value when it comes to choosing any equipment. But at these levels, details form microstructures can be focus stacked to create highly-detailed 3D-images when using software like Helicon Focus. This is a requirement as you increase magnification of your subject. That is why a safe place to start is with a stereoscope and larger subjects like insects and flora. You can view why you must focus stack below. This Rainbow Dung Beetle took 50+ images to stack because of the depth of focus I used. The blue area in the middle-right is actually part of its head and the gold in the right is around its eyes. This difference in focal planes adds up the higher your magnification gets.Where to Start & Common Questions
If you’re like me, you often find yourself scrolling Instagram out of boredom when you come across a cool idea or technique that you eagerly want to recreate. Of course, when you are really excited to learn the technique, the photographer doesn’t share or you can’t find online articles that give you insight. I find this a lot as I explore niche photography styles. Since I am self-taught in every field, I rely heavily on my so-called “Google-fu” skills and the ability to find what I need on the internet. A lot of questions I hear are “Where do I start?”, “What type of microscope/technique should I use?” and “Where can this type of photography take me?” To help save the time and effort, I have a list of extremely helpful links below. These links gave me a highly-detailed overview that allowed me to visualize what I could do with photomicrography as well as how I can create images like those below.
Millipede at 4.8X, Reflected Light with Glow Stick, ½”, ISO 100, 39 images stacked
Nikon Small World >
Nikon Instruments >
Microscopy U >
Helicon Soft >
Amateur Micrography >